Using the QuickHorse "Builder" - The "Method Builder"
This Tutorial will take several minutes to download if you are using a Modem. Please be patient, go make a sandwich or get a cup of coffee. There are a lot of screen shots in the tutorial so it will take time to download.
Method - Definition - A combination of up to 8 "Methods" which together for one Method of Handicapping. Each Method can then be BACKTESTed and SUPERTUNEd.
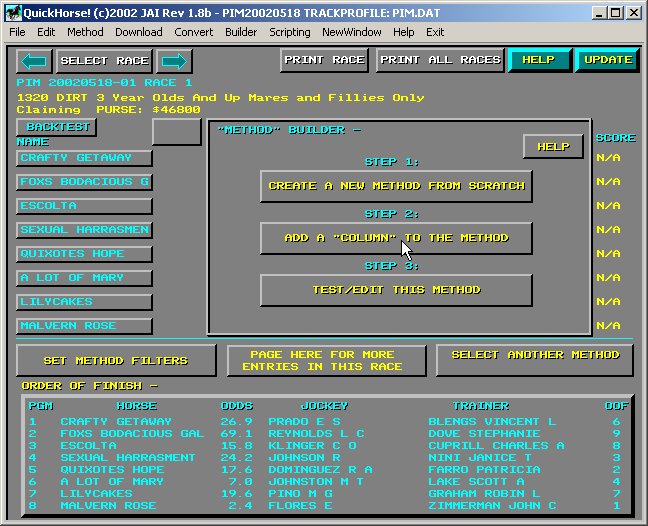
For purposes of this discussion we shall again return to our PIM 20020518 program which is a 13 race program. The user should then select the "Builder" Menu Bar item, and then the "Build_Method" menu item. Click on this to display the "Method" Builder Menu as it appears below in Fig. 1.
Figure 1 - Method Builder 1st Menu
We wish to build a Method from scratch using this online help, so select the button labeled "CREATE A NEW METHOD FROM SCRATCH". Figure 2 then appears as shown below.

Figure 2 - Identifying your New Method
The first step in creating a new METHOD is to identify it using two items of information. The "shortname", a five character name, and a description. The shortname will be used to create a filename for this METHOD. The description will be used to create a menu of all your methods so that you can tell what this method does. Also, the description is printed out when you finally print your tipsheet. Therefore, make sure your description describes your METHOD so that you will recognize it later.
For this tutorial exercise, type in "MYM01" as the shortname, make sure you press ENTER after you type in this shortname. Then, for a description, type in "My First Quickhorse Method". Once again, type ENTER to enter this information. Look over the information and if you need to, retype it to make any corrections. Once you are finished, click on the OK button beneath the entered information. If you've followed these simply directions, you will see Figure 3, shown below.
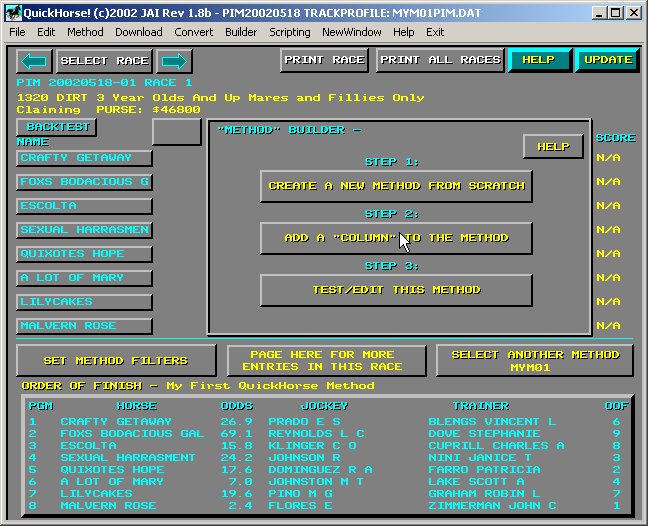
Figure 3 - Building a Method, Adding a Column to the Method
Notice your shortname, and description appear (just above the Predicted "Order of Finish" button, and in the "Select Another Method" button) to let you know which Method you are working on. Also, notice that there is no Column data shown on this display yet. That's your next "mission", to add a COLUMN to your brand new Method. You are directed to "ADD A COLUMN TO THE METHOD". That's pretty easy to follow, so go ahead and click on that prompt. You are about to create COLUMN 1 of your Method.
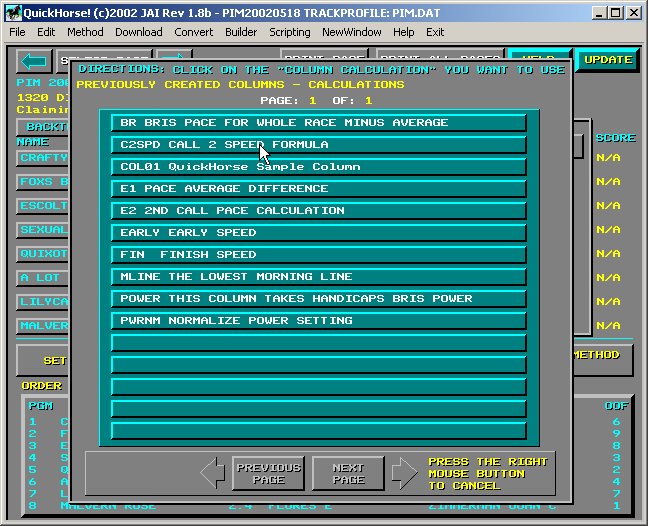
Figure 4 - Adding a Column to your Method - Selecting the Column
You will find Method Building pretty quick and easy to do as LONG AS YOU'VE CREATED COLUMNS. Quickhorse includes some sample COLUMNS that we have produced here for testing. These Columns that we've produced as for Sample only and the user shouldn't necessarily trust in them as parts of your Method. However, for this tutorial, we will use these Columns to build a Method from scratch.
To continue, click on the "E1 PACE AVERAGE DIFFERENCE". Keep in mind, that you would know exactly what this Column is if you had created it, so its NOT important to understand that this Column does. We are only taking you through the steps that you need in order to build a Method.
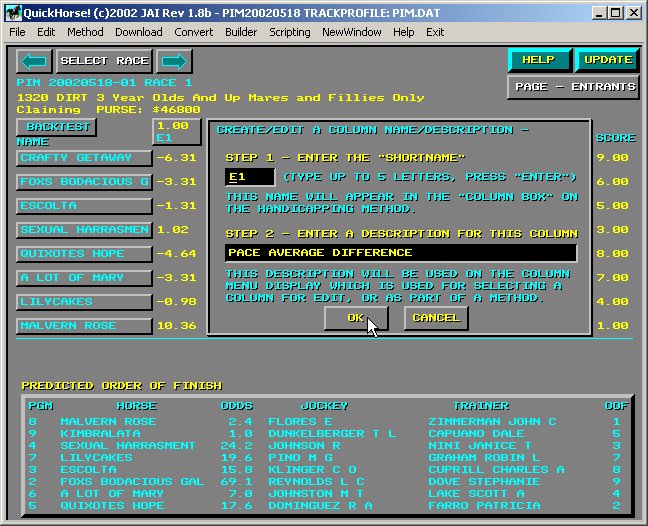
Figure 5 - "E1 PACE AVERAGE DIFFERENCE" has been selected
The Column Selected is displayed and all you have to do is VERIFY that this is the one you wish to select. Simply click the "OK" button. Note also, that the E1 Column has been installed and evaluated on the display and you can see the values that it calculated for each horse in the race. Looks like MALVERN ROSE is an exceptional animal using this Column. Further inspection of the Predicted order of Finish shows that this horse actually won the race!
A final note on this display - you may change the description of this Column if you wish. To do so, press the ENTER key to "tab to" the DESCRIPTION field. Then type over the existing description and press ENTER again. Make sure you always press ENTER when you type information into QuickHorse.

Figure 6 - Displaying Your First Handicapping Method
After selecting the OK button in Figure 5, QuickHorse displays your Method completely up to this point. We've added our first Column and now we can add others very quickly. Notice the 7 EMPTY buttons to the right of our E1 Button. You may add columns to this method simply by clicking on each one in order from LEFT to RIGHT across the display. Keep in mind that for a method, you only need ONE COLUMN but you can have as many as 8 COLUMNS.
Now, go ahead and click on the first empty column to the right of but next to the E1 Column Button.
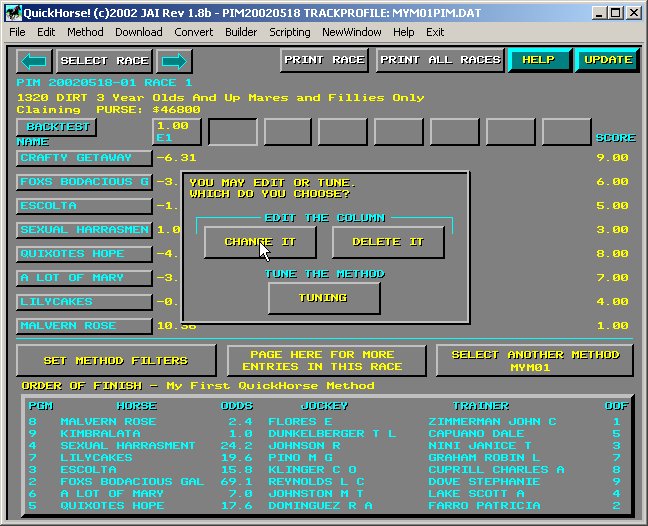
Figure 7 - Using the CHANGE IT button to ADD another Column
While creating a Method, you can also TUNE (SUPERTUNE or SINGLE TUNE or Manually TUNE the method), and you can swap in Columns for other Columns (CHANGE IT), or if a column doesn't exist, the "CHANGE IT" button allows you to ADD a column to your Method. So, simply click on the "CHANGE IT" button to continue.
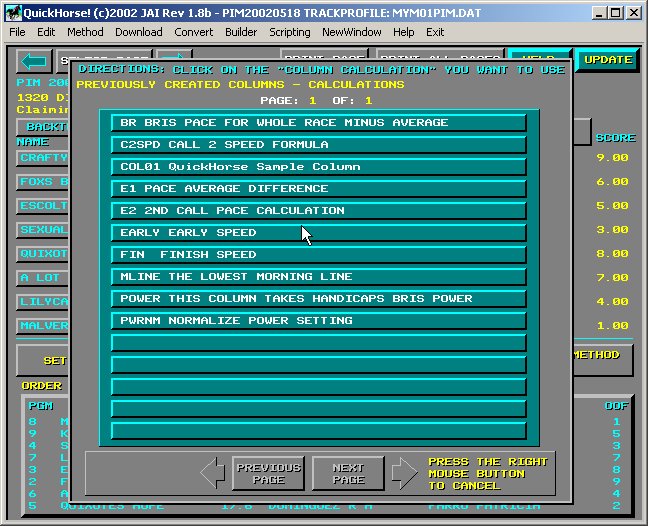
Figure 8 - Looks familiar? You now select another Column
At this point, adding Columns to your Method is a repetitive process. So, go ahead and ADD another Column. This time, choose the "POWER THIS COLUMN TAKES HANDICAPS BRIS POWER". Then, click OK. When you are finished with these two quick steps, you should be looking at something which looks like Figure 9.
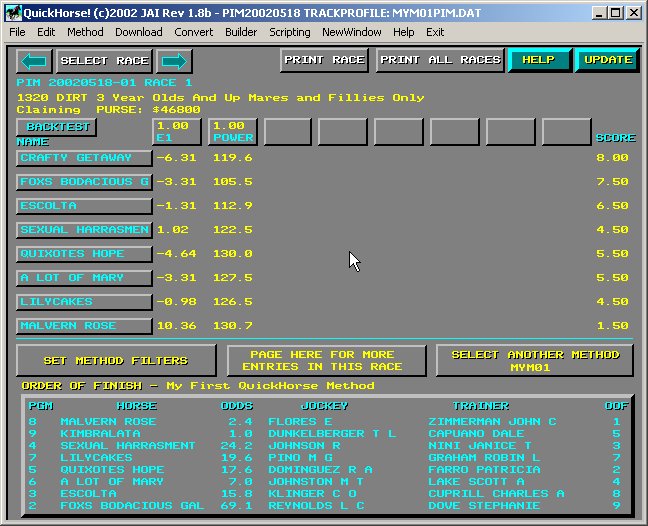
Figure 9 - Back to the Method Display
Each time you add a column, your method is automatically stored so you don't have to worry about saving your method. As stated previously, you may now click on an empty Column, or click on a previously created Column so that you can change it, delete it, or tune it. At this point you should continue to experiment with these features.
There is one more help item you should now look at once you've created your Handicapping Method. That is the "METHOD Selection" help Tutorial. This tutorial shows you how to select among all your Handicapping Methods and the Standard Handicapping Method which we've provided.
Click HERE to learn about Selecting a Method
As always we invite your questions and comments via email - jai@gorge.net
Copyright 2002 JONSOG associates, Inc. PO Box 911, Lyle, WA 98635 Last Updated on - 08/06/2002